> ## Documentation Index
> Fetch the complete documentation index at: https://unify-19-preview.mintlify.site/llms.txt
> Use this file to discover all available pages before exploring further.
# Creating a custom send schedule
> Learn how to configure Custom Send Schedules for Sequences.
## Navigation
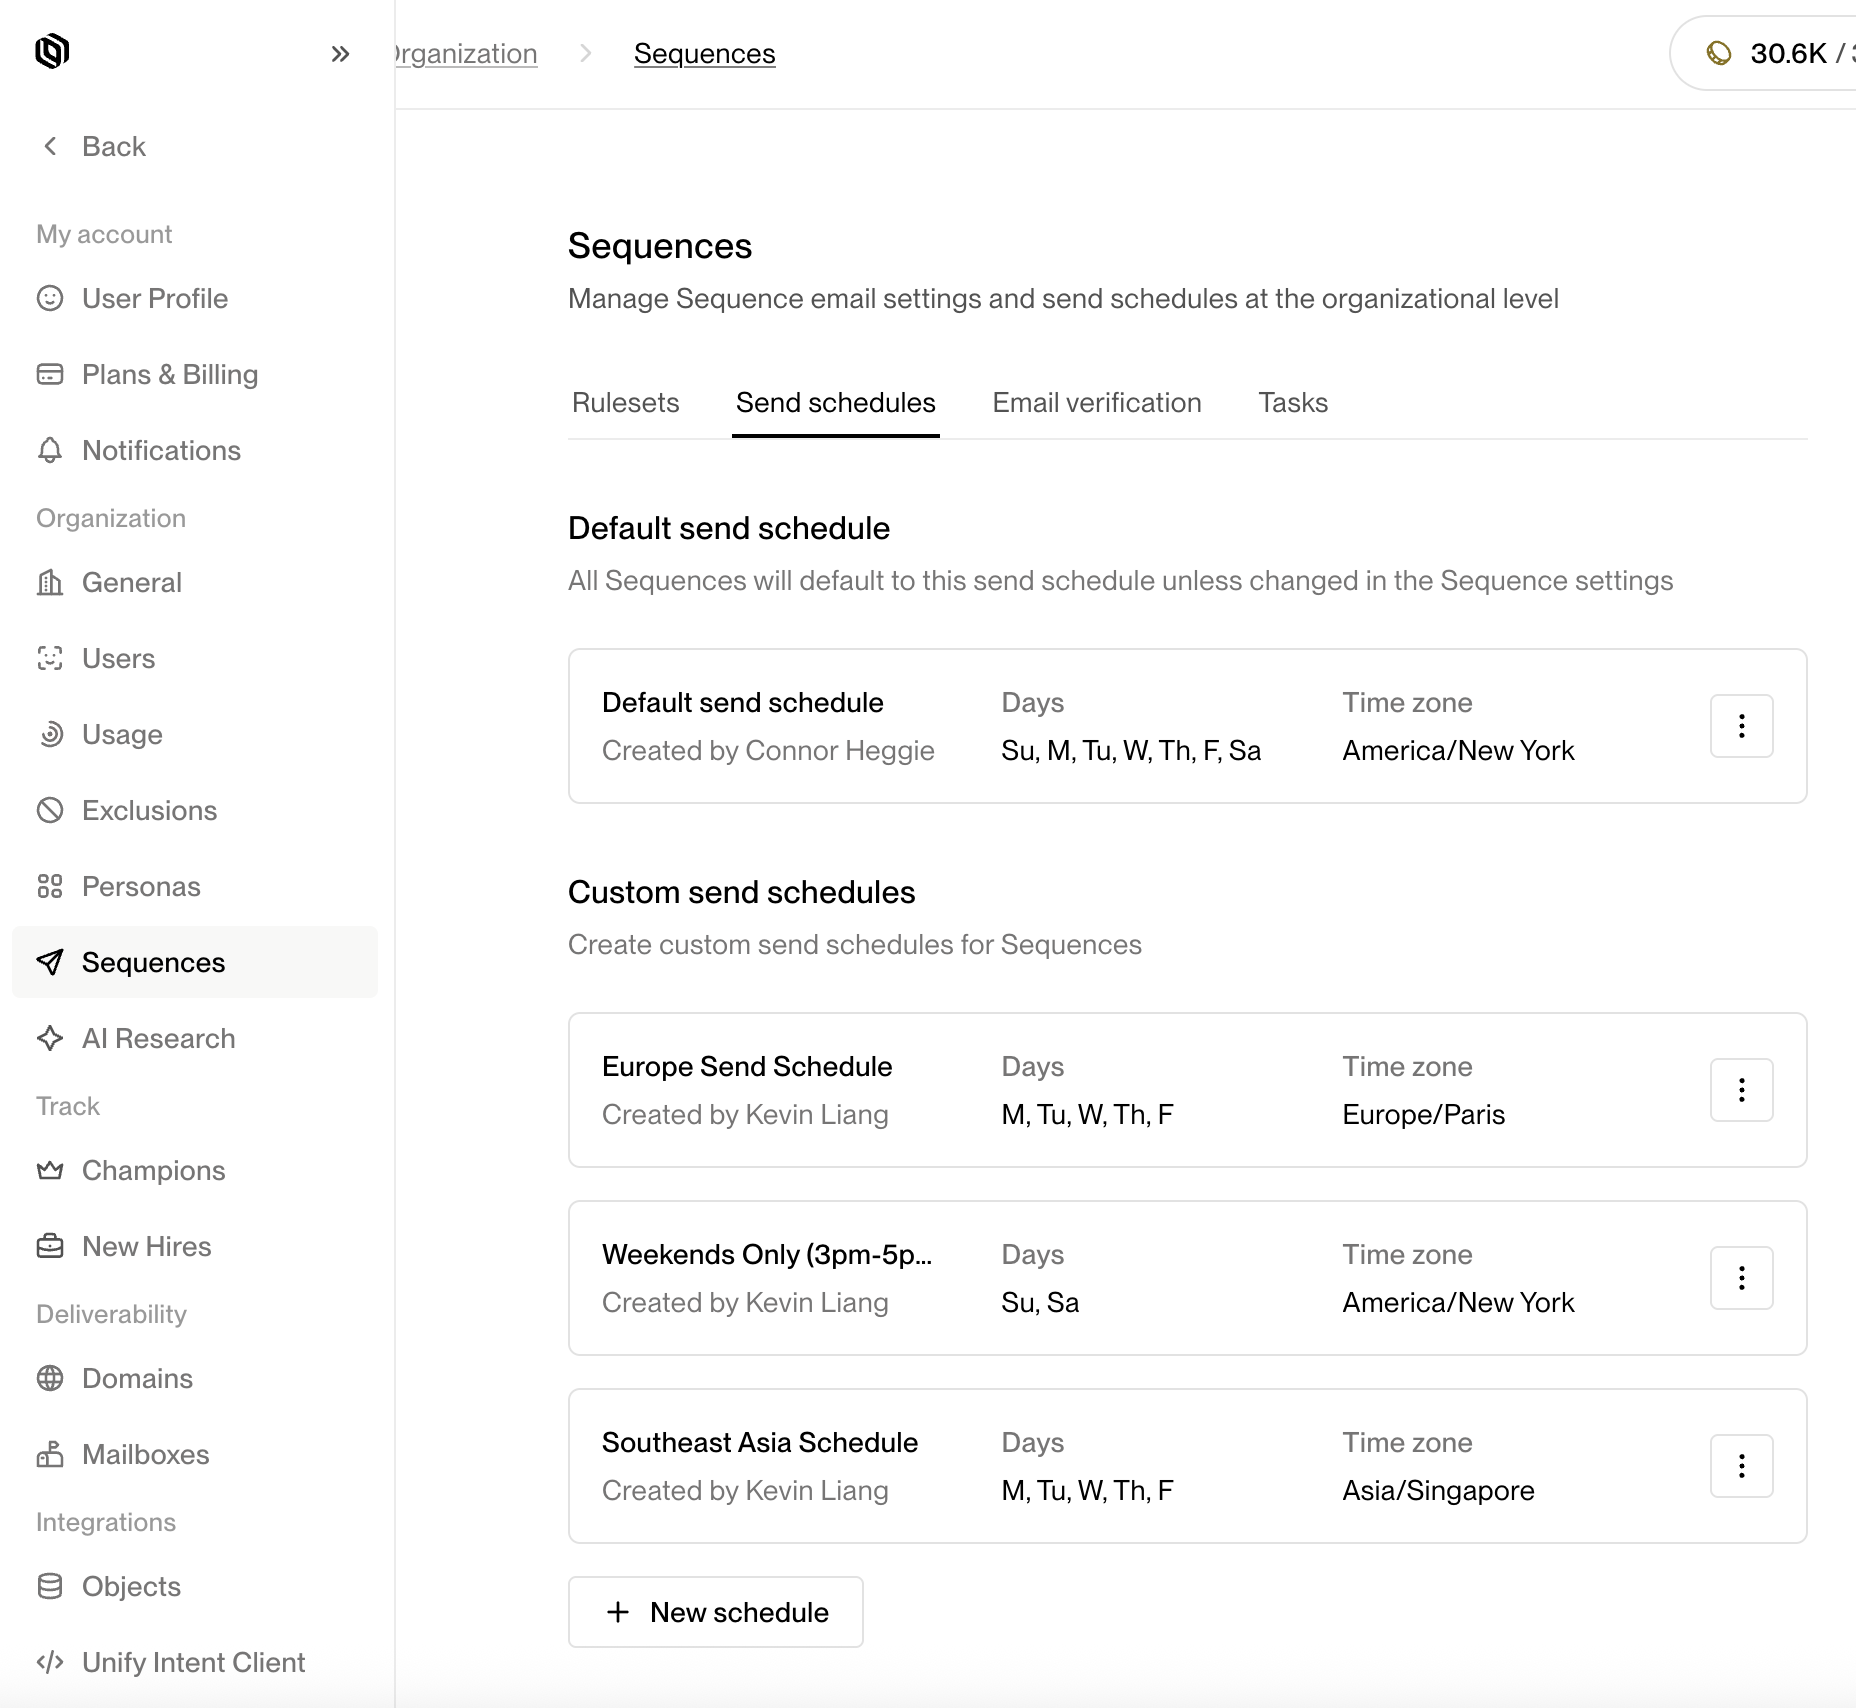
You can access the Custom Send Schedules page by navigating to:
**Settings → Organization → Sequences → Send Schedules**.
Once you are on this page, click the **+ New Schedule** button to create a new Custom Send Schedule.
 ## Configuring a new custom send schedule
After clicking the **+ New Schedule** button, a configuration drawer will open, allowing you to define the parameters of your new Custom Send Schedule.
### General
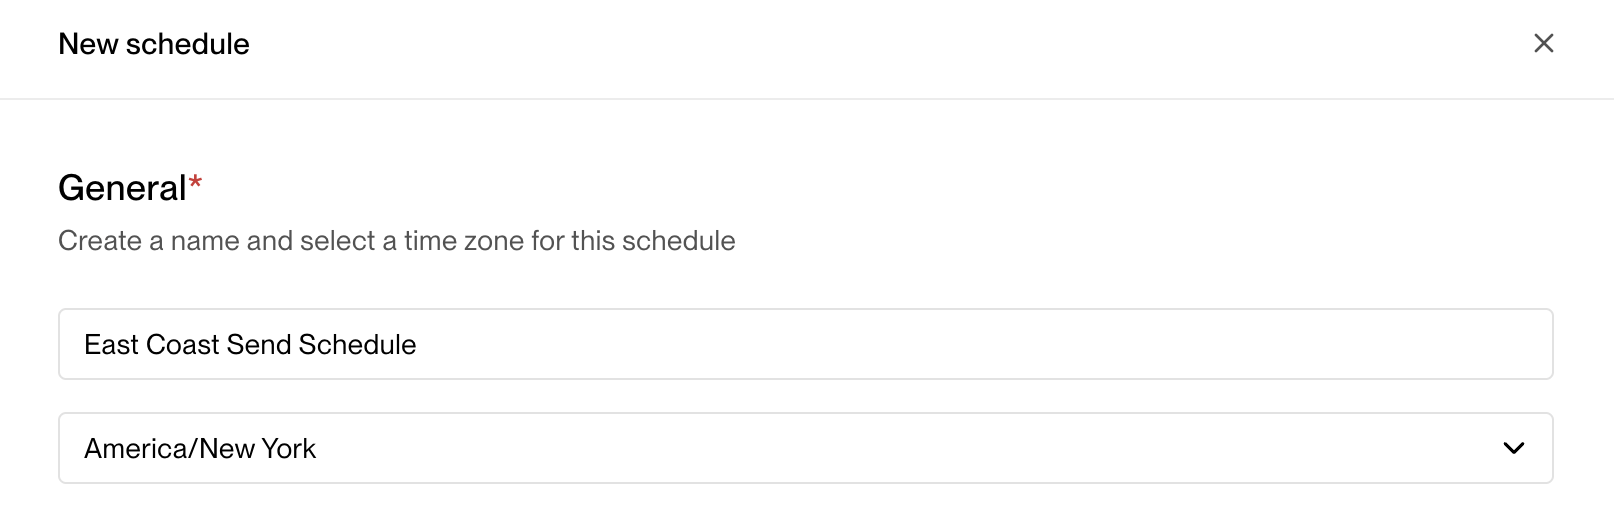
Under the **General** section, you can configure the basic information for your Custom Send Schedule.
* **Name** — Provide a clear, descriptive name for your Custom Send Schedule (e.g., *North America Weekdays* or *APAC Morning Outreach*).
* **Time Zone** — Select the time zone in which the schedule will operate. This ensures that all send windows and skip dates align to the correct local time. (e.g., America/Los Angeles, Europe/London, Asia/Singapore)
## Configuring a new custom send schedule
After clicking the **+ New Schedule** button, a configuration drawer will open, allowing you to define the parameters of your new Custom Send Schedule.
### General
Under the **General** section, you can configure the basic information for your Custom Send Schedule.
* **Name** — Provide a clear, descriptive name for your Custom Send Schedule (e.g., *North America Weekdays* or *APAC Morning Outreach*).
* **Time Zone** — Select the time zone in which the schedule will operate. This ensures that all send windows and skip dates align to the correct local time. (e.g., America/Los Angeles, Europe/London, Asia/Singapore)
 > 💡 **Tip:** If your team operates globally, create separate Custom Send Schedules for each region to ensure messages are sent during local business hours.
***
### Windows
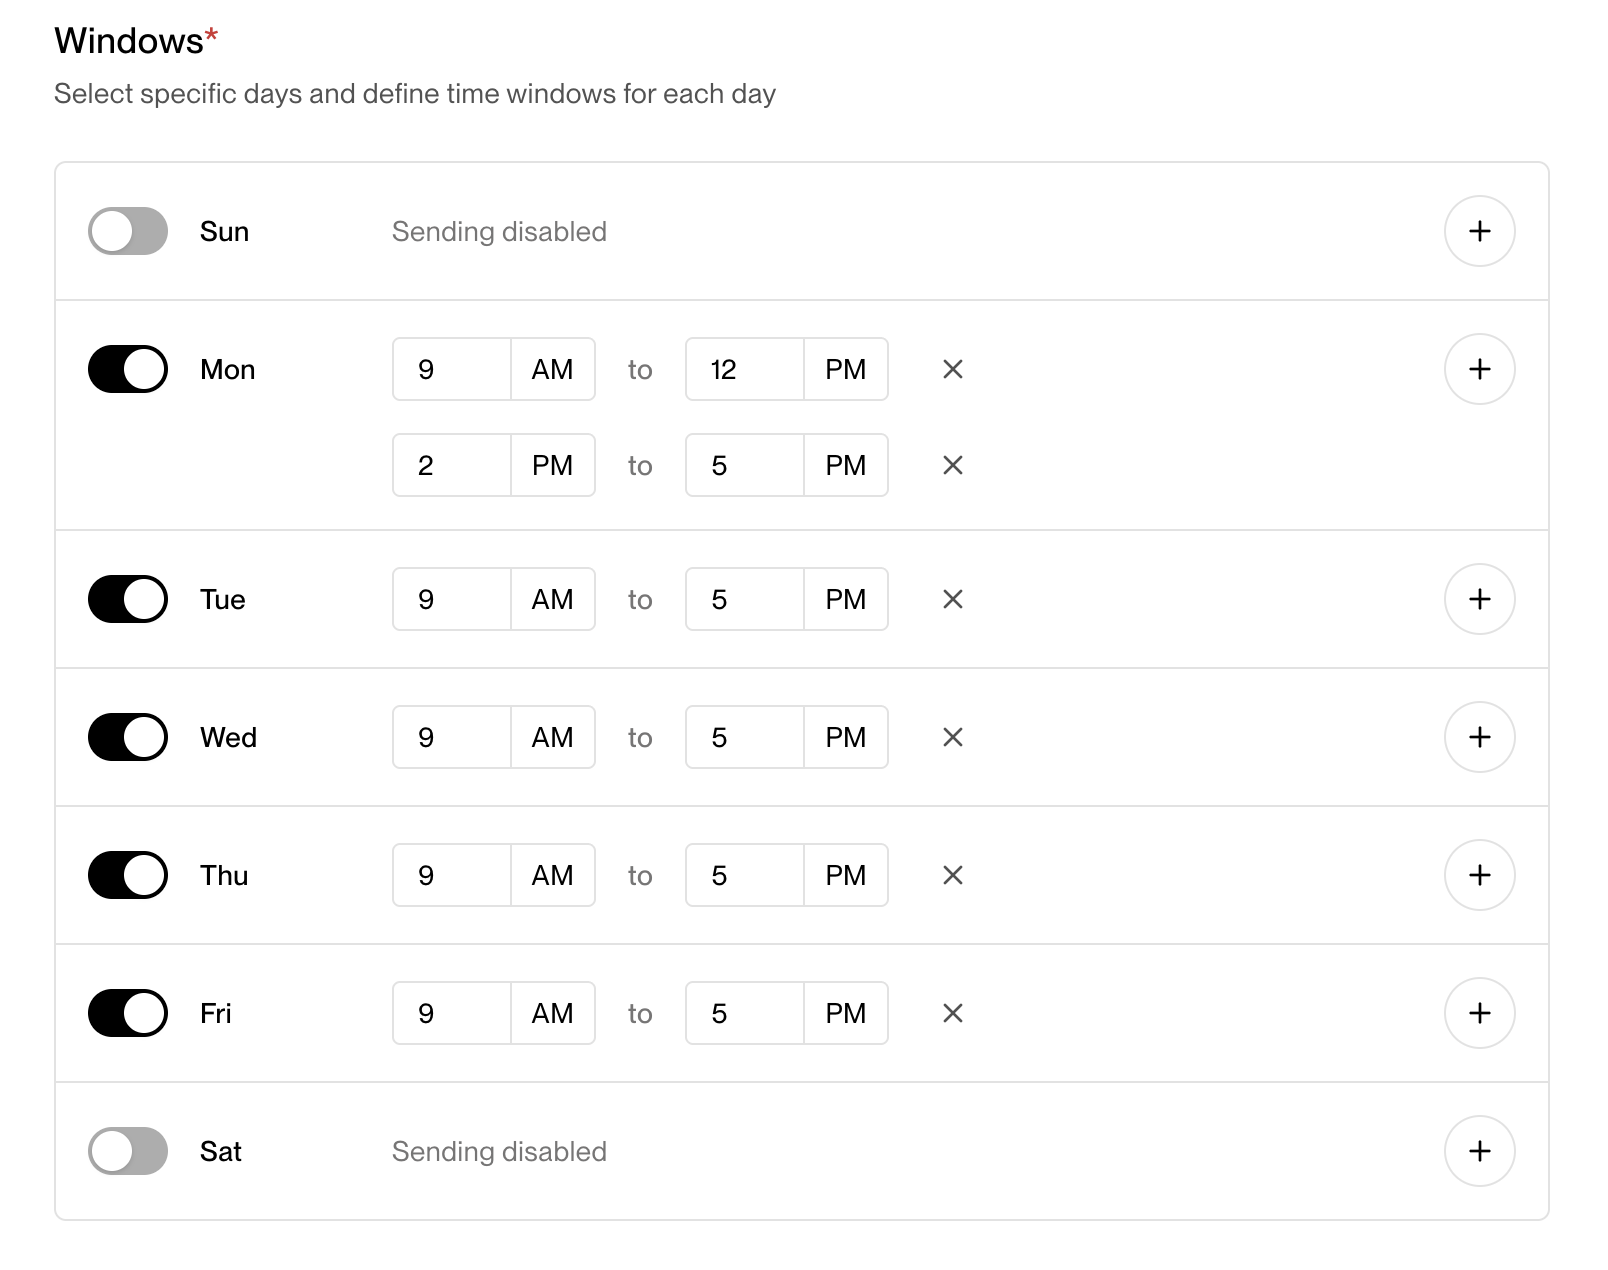
The **Windows** section defines when Unify is allowed to send automated messages through Sequences during the week.
For each day of the week, you can:
* Enable or disable sending (for example, enable Monday–Friday and disable Saturday–Sunday).
* Specify one or more **time windows** when messages can be sent (e.g., 9 AM to 12 PM, 1 PM to 5 PM).
> 💡 **Tip:** If your team operates globally, create separate Custom Send Schedules for each region to ensure messages are sent during local business hours.
***
### Windows
The **Windows** section defines when Unify is allowed to send automated messages through Sequences during the week.
For each day of the week, you can:
* Enable or disable sending (for example, enable Monday–Friday and disable Saturday–Sunday).
* Specify one or more **time windows** when messages can be sent (e.g., 9 AM to 12 PM, 1 PM to 5 PM).
 **Example:**
If you want outreach to happen only during typical working hours, you might configure:
* Monday–Friday: 9:00 AM to 4:30 PM
* Saturday & Sunday: Disabled
> **Note:** Messages queued outside of active windows will automatically be held until the next available send window.
***
### Skip dates
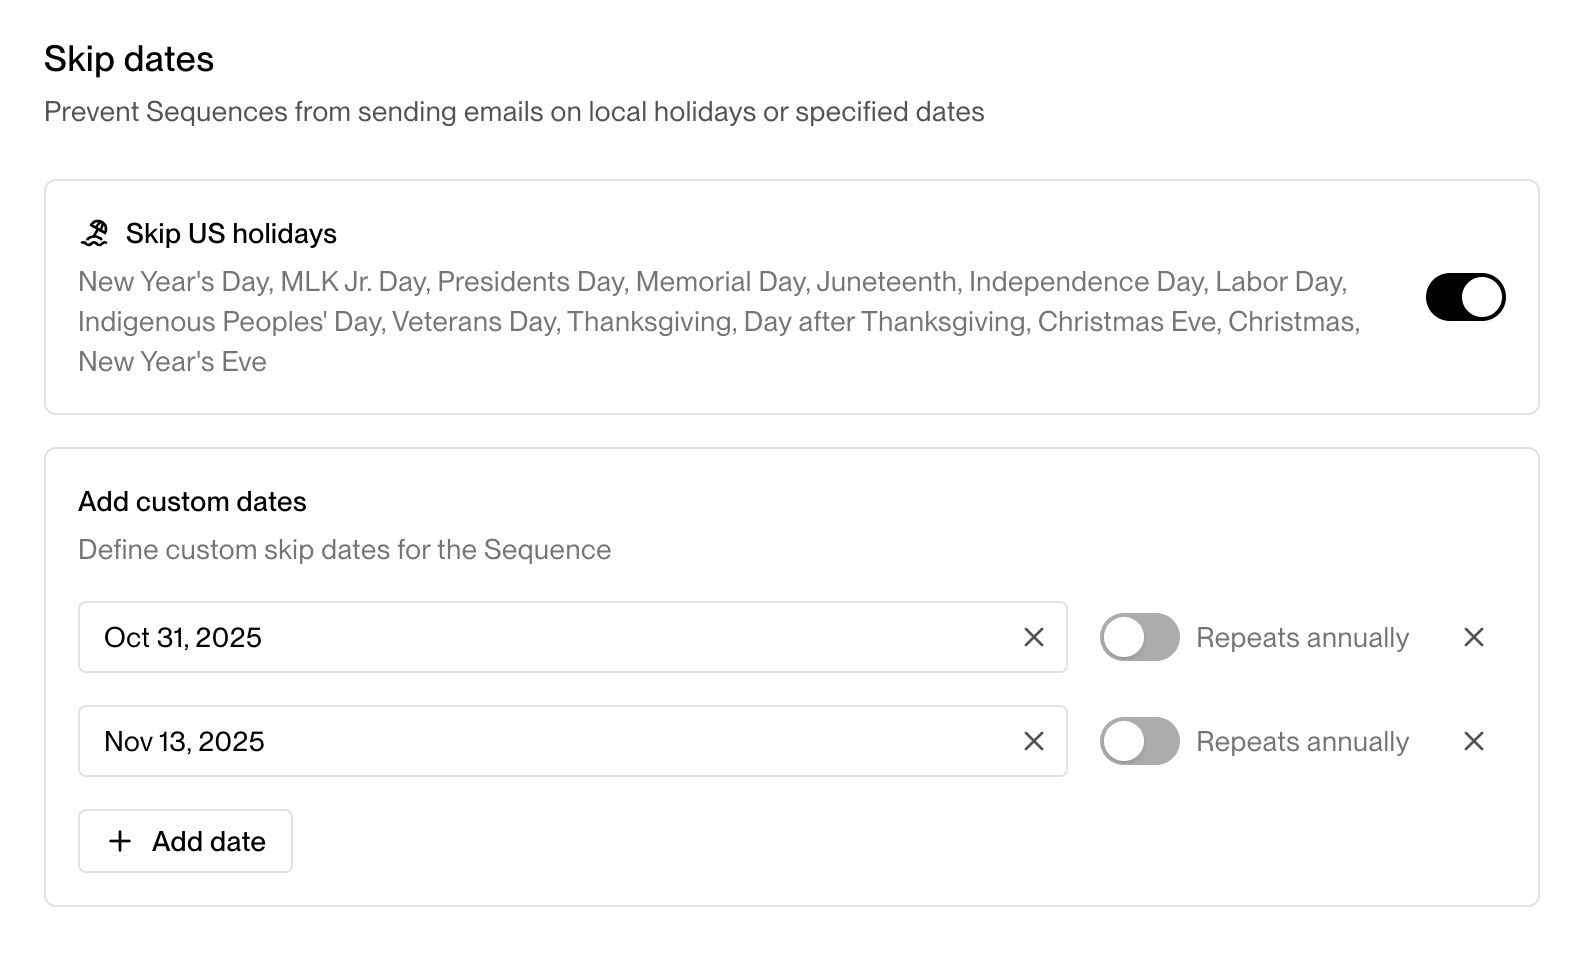
Skip Dates allow you to automatically **pause sending on holidays or custom dates**.
This helps maintain deliverability and professionalism by avoiding sends on non-working days.
There are two ways to configure Skip Dates:
1. **U.S. Holidays** — Toggle this option to automatically skip sending on major U.S. federal holidays (e.g., New Year’s Day, Independence Day, Thanksgiving).
2. **Custom Dates** — Add specific dates or recurring dates (such as company off-sites, local holidays, or yearly breaks).
You can specify whether custom dates repeat **annually** or occur **once**.
**Example:**
If you want outreach to happen only during typical working hours, you might configure:
* Monday–Friday: 9:00 AM to 4:30 PM
* Saturday & Sunday: Disabled
> **Note:** Messages queued outside of active windows will automatically be held until the next available send window.
***
### Skip dates
Skip Dates allow you to automatically **pause sending on holidays or custom dates**.
This helps maintain deliverability and professionalism by avoiding sends on non-working days.
There are two ways to configure Skip Dates:
1. **U.S. Holidays** — Toggle this option to automatically skip sending on major U.S. federal holidays (e.g., New Year’s Day, Independence Day, Thanksgiving).
2. **Custom Dates** — Add specific dates or recurring dates (such as company off-sites, local holidays, or yearly breaks).
You can specify whether custom dates repeat **annually** or occur **once**.
 > 💡 **Tip:** Use Skip Dates to prevent outreach from occurring during out-of-office periods or industry-wide holidays that may impact engagement.
***
### Saving the custom send schedule
Once you’ve configured the General settings, Windows, and Skip Dates, click **Create** to save your Custom Send Schedule.
It will now appear in the **Custom Send Schedules** list view, where you can edit, duplicate, or delete it at any time.
Your new Custom Send Schedule is now ready to use!
This documentation is built and hosted on [Mintlify](https://mintlify.com), a developer documentation platform.
> 💡 **Tip:** Use Skip Dates to prevent outreach from occurring during out-of-office periods or industry-wide holidays that may impact engagement.
***
### Saving the custom send schedule
Once you’ve configured the General settings, Windows, and Skip Dates, click **Create** to save your Custom Send Schedule.
It will now appear in the **Custom Send Schedules** list view, where you can edit, duplicate, or delete it at any time.
Your new Custom Send Schedule is now ready to use!
This documentation is built and hosted on [Mintlify](https://mintlify.com), a developer documentation platform.