> ## Documentation Index
> Fetch the complete documentation index at: https://unify-19-preview.mintlify.site/llms.txt
> Use this file to discover all available pages before exploring further.
# Using a custom send schedule
> Learn how to view and apply Custom Send Schedules for Sequences.
Custom Send Schedules define when automated emails in a Sequence are allowed to send. Once you’ve configured your Custom Send Schedule, you can assign them to individual Sequences.
***
## Accessing sequence settings
To view or edit the Custom Send Schedule assigned to a Sequence:
1. Open any Sequence from your **Sequences** list.
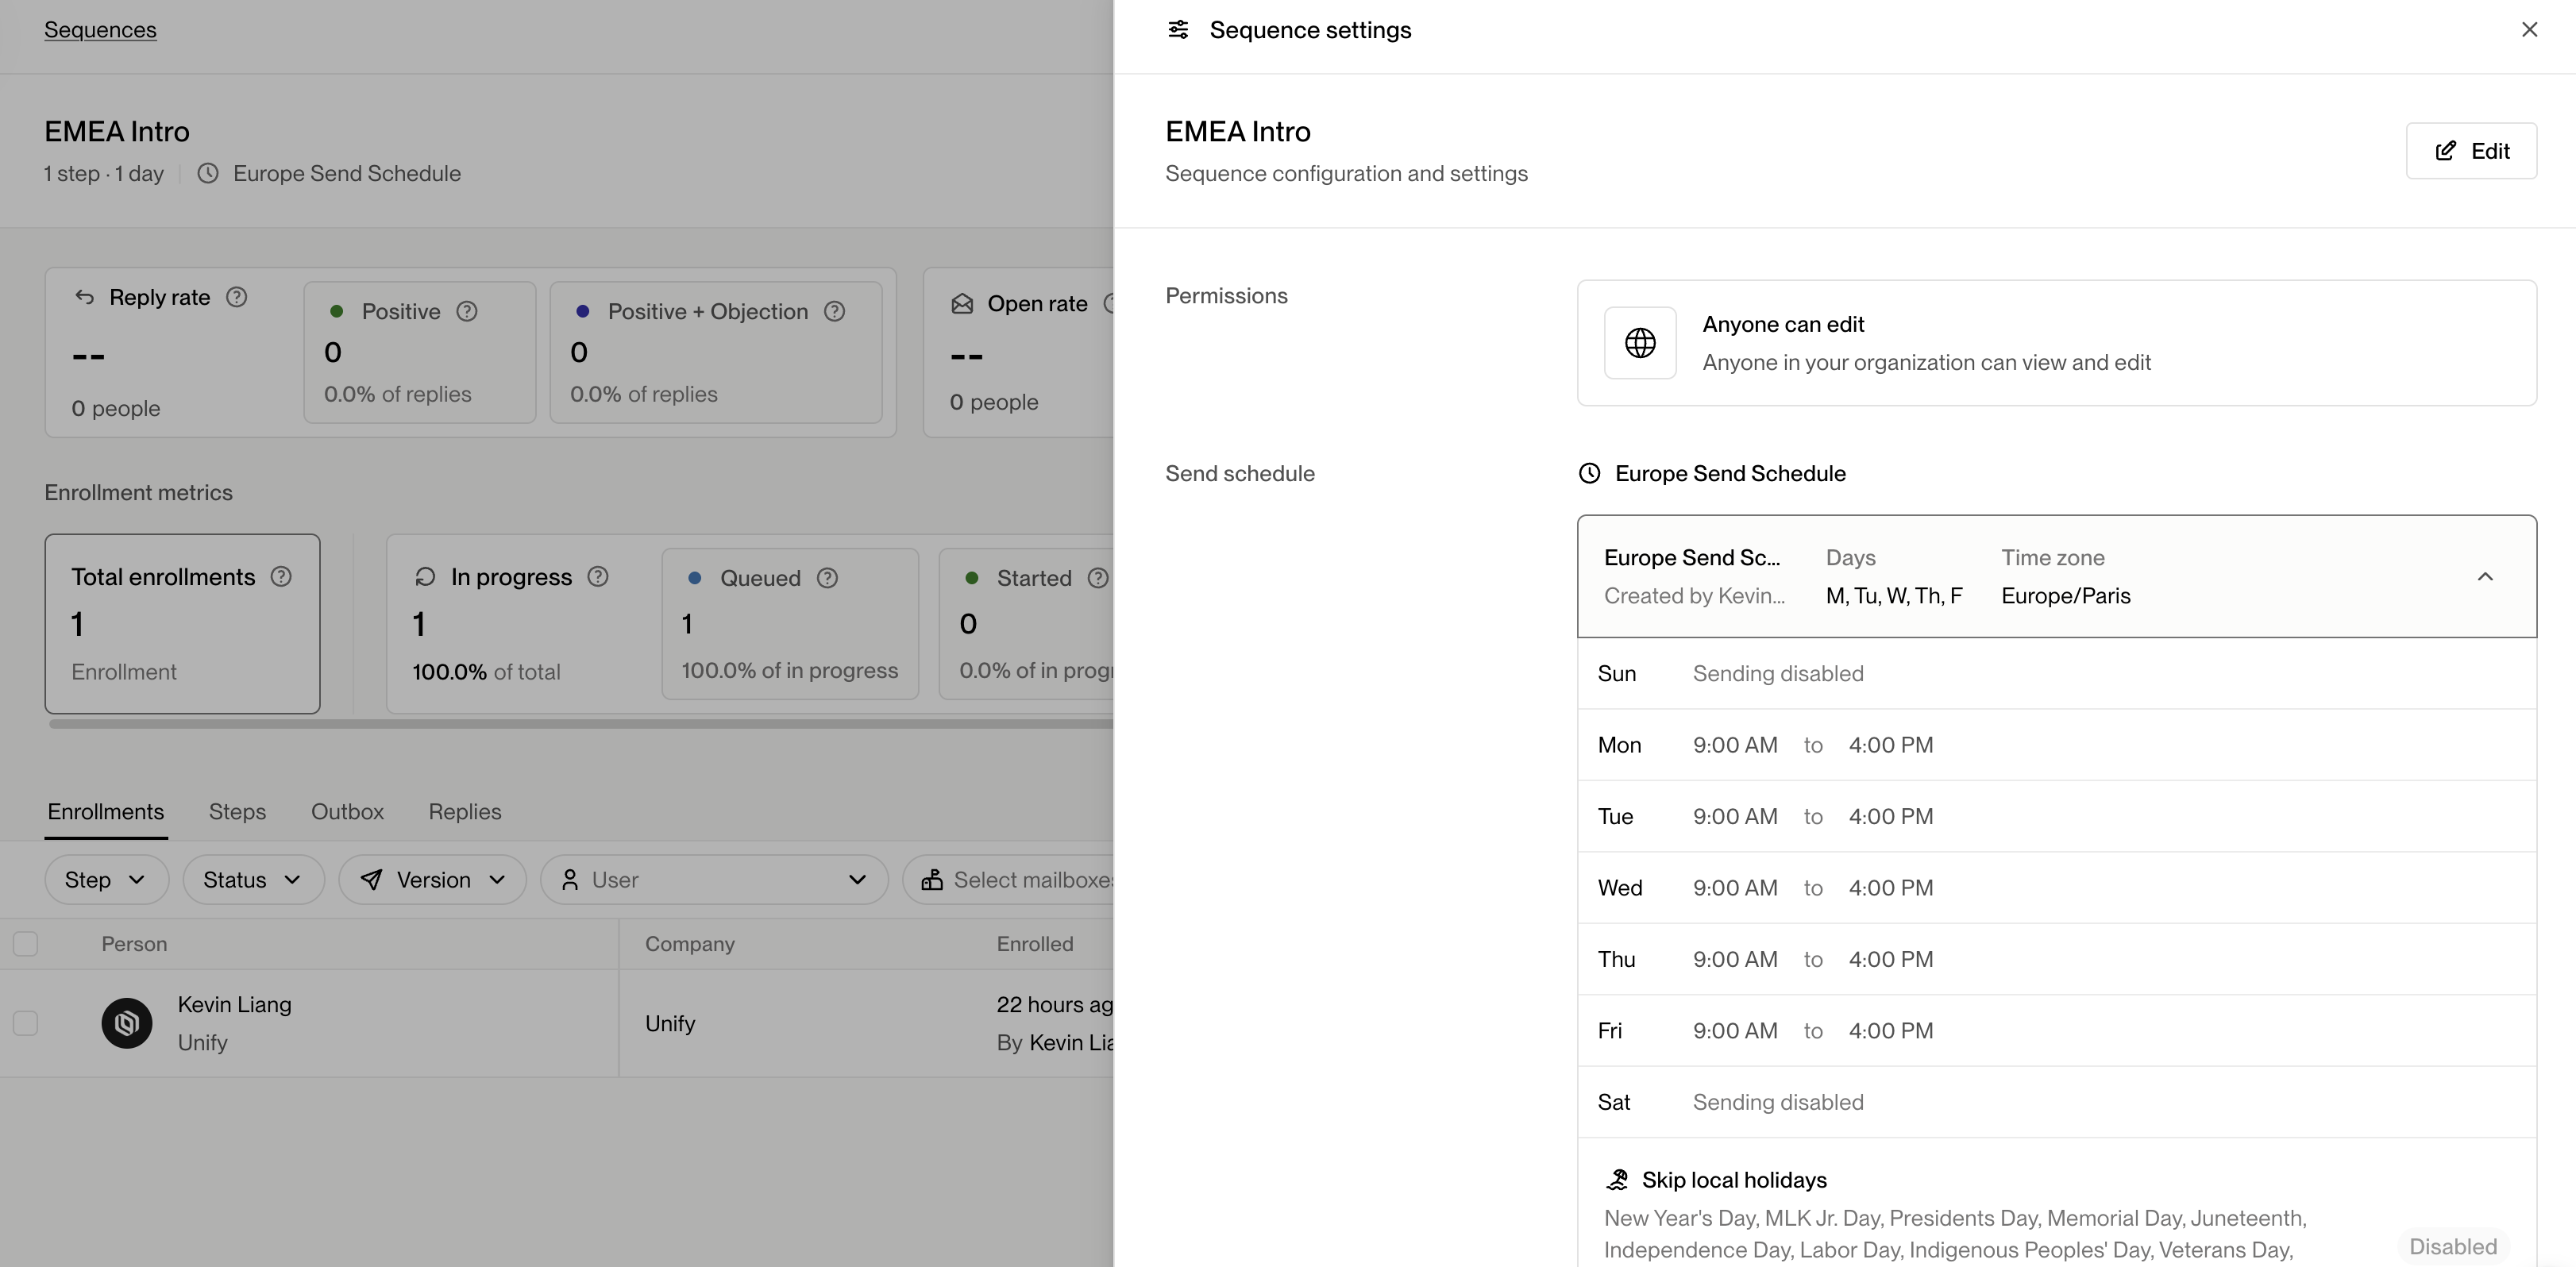
2. Click the **⚙️ cog icon** in the top-right corner to open **Sequence Settings**.
3. In the settings drawer, you’ll see a section labeled **Send schedule**, displaying the currently linked schedule and its details.
 ***
## Selecting a custom send schedule
To change which Custom Send Schedule a Sequence uses:
1. Click **Edit** in the top-right corner of the Sequence Settings drawer.
2. Open the **Send schedule** dropdown.
3. Choose the desired schedule from the list. You’ll see details including:
* Schedule name
* Timezone
* Days enabled for sending
* Sending windows per day
* Skip dates
***
## Selecting a custom send schedule
To change which Custom Send Schedule a Sequence uses:
1. Click **Edit** in the top-right corner of the Sequence Settings drawer.
2. Open the **Send schedule** dropdown.
3. Choose the desired schedule from the list. You’ll see details including:
* Schedule name
* Timezone
* Days enabled for sending
* Sending windows per day
* Skip dates
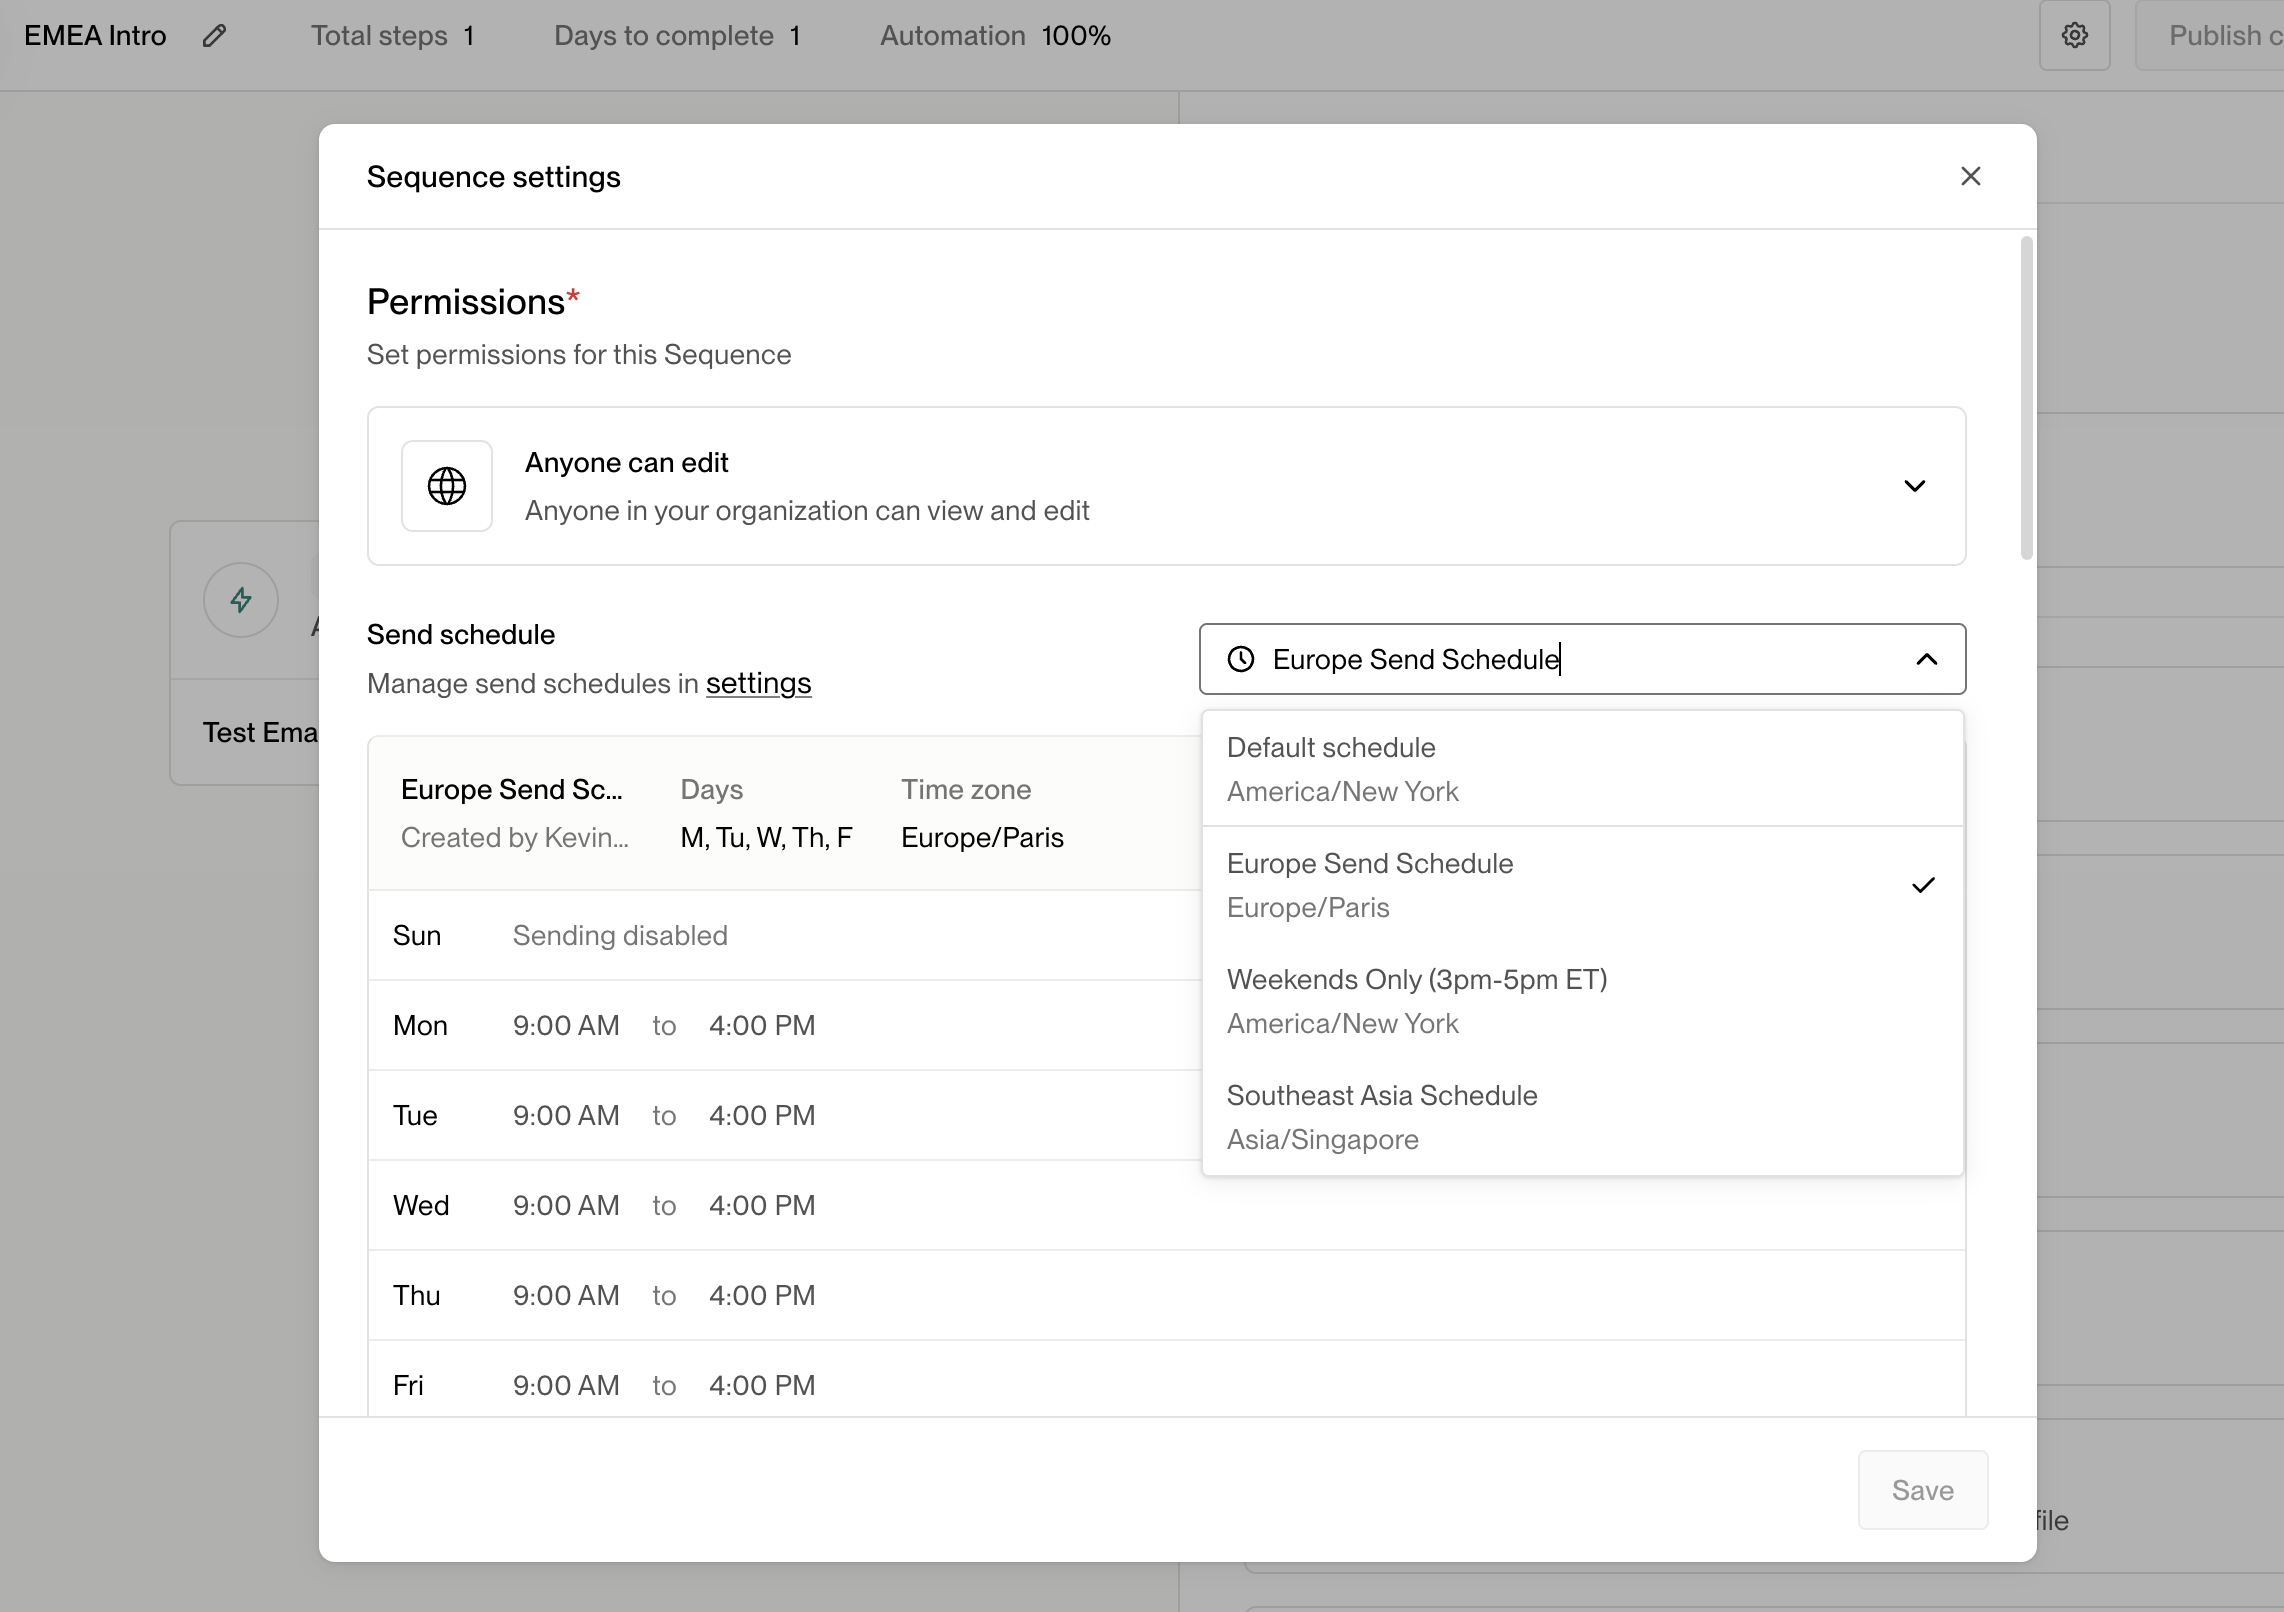 After you’ve selected a schedule, click **Save** to apply it.
***
## Important notes
When linking a new Custom Send Schedule to an active Sequence, **Unify will
immediately reschedule all pending emails for that Sequence** according to the
new Custom Send Schedule configurations.
> 💡 **Tip:** If you’re running outreach across multiple regions, use different Custom Send Schedules for each region’s Sequences to optimize timing and engagement.
***
This documentation is built and hosted on [Mintlify](https://mintlify.com), a developer documentation platform.
After you’ve selected a schedule, click **Save** to apply it.
***
## Important notes
When linking a new Custom Send Schedule to an active Sequence, **Unify will
immediately reschedule all pending emails for that Sequence** according to the
new Custom Send Schedule configurations.
> 💡 **Tip:** If you’re running outreach across multiple regions, use different Custom Send Schedules for each region’s Sequences to optimize timing and engagement.
***
This documentation is built and hosted on [Mintlify](https://mintlify.com), a developer documentation platform.